A Glimpse into the History of a Cryostat
A Cryostat is a versatile and high-quality machine that generates low temperatures for tissue sectioning. The word “Cryostat” originates from two separate Greek words “Kryos”, meaning cold, and “stat”, meaning stable. Sir James Dewar, a Scottish Physicist, and Chemist are credited for the use of the very first cryostats in the 19th century.[1]
These earlier cryostats – named “Dewar” after the inventor, were just a glimpse into the potential benefits of a cryostat. By the 20th century, the cryostat evolved into more specialized and useful pieces of equipment which had many applications in Science and Engineering.
In the healthcare industry, cryostats are used in magnetic resonance imaging (MRI), tissue sectioning, and other pathological applications. There are numerous types of cryostats with varied applications. This article concentrates on the medical applications of a microtome-equipped Cryostat, which have become game-changers in the medical field.
Cryostat-Microtomes in Immunohistochemistry Laboratories
Major 20th-century advances in the field of fluorescently-labeled antibody staining techniques gave rise to the need for cutting fine tissue sections (~5 microns thick). This field of biology is known as Immunohistochemistry (IHC), a technique that uses antibodies to selectively identify antigens (proteins) in tissue sections.
A classic example of its application is the biopsy of tissue samples to identify markers of cancer. The only way to achieve fine sections, required in immunohistochemistry applications, is to use a freezing temperature chamber (while sectioning the tissue sample).
In the absence of this kind of chamber, the tissue samples are too soft to cut into thin sections. This cold chamber prevents the sample from thawing when the sectioning is in progress and also reduces the destruction of the tissue sample from microorganisms.
This cryo-section is absolutely essential when results are expected quickly and the antigenicity of sensitive molecules is to be preserved.
When we consider tissue biopsies for identifying and treating diseases, it is critical (for example) to provide doctors with the quick and correct information for the downstream treatment of patients. The patient samples are sent to the IHC lab for analysis.
In an IHC lab, these samples are processed in a cryostat which holds a microtome. Briefly, a microtome is an apparatus that cuts thin tissue sections for analysis. The thin slices created by the cryostat are known as cryo-sections which are then analyzed under the microscope.
These ultra-thin sections enable scientists to reach a better conclusion regarding the nature of a disease in a time-efficient manner.
Essential Components of the Cryostat-Microtome
The design of the cryostat depends on its application, in other words, it has to be designed in such a way that the device fitted into the cryostat is fully insulated as well as functional.
Although all Cryostat-microtomes follow the same scientific principle, the information provided below uses one of the Cryostat-microtomes from Leica (Leica CM1950) as an example.
Components of the Cryostat-Microtome, their Uses, and Care Instructions
1. Waste container
This holds the water generated by the continuous frost-defrost cycles inside the cryostat. This water can be a source of sample contamination; thus, it is important to dispose of it in the waste container.
2. Freezing chamber
As the name suggests, it is the chamber that houses the microtome and keeps it at a low temperature while sectioning.
3. Specimen disc
This holds the tissue specimen in place while it is being sectioned with the knife.
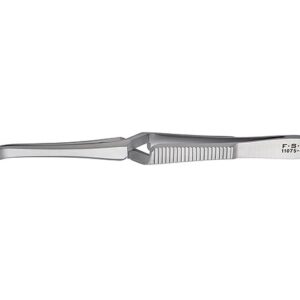
4. Microtome blade and blade holder
In order to observe tissue under microscopes, it needs to be sliced to an appropriate width (in order of a few microns in width). This requires precision cutting with very sharp blades. The blades are held in position by the blade holder.
5. Glass slide door
This is basically a cover for the cryostat.
6. Anti-roll plate
The anti-roll plate prevents curling of the tissue sections after they have been sliced by the blade.
7. U.V source
The ultraviolet light is an efficient sterilizer of surfaces and is, thus, used to sterilize the cryostat chamber. Usually, 35-minute U.V irradiation is sufficient for sterilization.
8. Source of freezing temperature
Low temperatures are maintained inside a cryostat with various modes of refrigeration. Liquid nitrogen or low temperatures by condensers. Helium is also used in cryostats, especially for cooling cryogenic detectors. The liquid cryogens are held in Dewar’s, which are built to match safety standards. It is essential to carry out regular checks to ensure that there is no physical damage to the Dewar.
9. Peltier stage
This is a thermo-electric device that gets rid of the heat from the cryostat chamber by increasing diffusion towards a cold stage.
10. Control panel
The control panel, as the name suggests is the hardware interface for the user to operate the Cryostat. It displays the following options:
- Lamp On/Off switch: to illuminate the Cryostat.
- V On/Off switch: to put on the U.V when sterilization is needed.
- Manual defrosting button: used to control manual defrosting. The cryostat defrosts once the experiment ends.
- Control panel lock: prevents accidental modifications in the Cryostat’s protocol set.
- Timer: the cryostat can be programmed to run for a specified length of time. It also manages the defrost timing.
- Temperature control: as the name suggests, it controls the temperature.
- Controller: for movement of sample towards the knife.
11. Specimen chuck and chuck holder
Chuck is the adapter on which the tissue sample is mounted. It has a crossing grid pattern which provides better gripping. These chucks are made of stainless steel, which makes them more durable.
Chucks are available in different sizes depending on the size of the sample to be processed. When in use, the chucks are kept at low temperatures in the cryostat.
The Science Behind Cooling the Cryostat
The selling point of any cryostat is its ability to maintain a low temperature. An underlying theory of a cryostat is the application of the concepts of heat exchange and gas laws. At its core, a cryostat has a couple of tubes.
The first tube (tube 1) has liquid nitrogen while the second tube (tube 2) contains nitrogen gas, which is maintained slightly above the atmospheric pressure. Tube 1 is placed inside tube 2. The liquid nitrogen is vented out via a small opening in a stopper known as Flange.[3]
Due to this leak, the heat from tube 2 is conducted to tube 1 and is absorbed by the liquid nitrogen. The vaporization of liquid nitrogen removes heat from the system, thus, cooling the cryostat. The rate of heat transfer depends on the material of the tubes.
Usually, silver or copper tubes are best for tube 1, but Aluminum is used in most cases to cut cost. Tube 2 is generally made of stainless steel.
How the Cryostat-Microtome Works
Note: How various parts of the Cryostat-microtome works are briefly described in the section below.
1. Preparing and mounting the samples in the cryostat-microtome:
The tissue samples are flash-frozen in liquid nitrogen at a temperature of -196-degree C. This method of freezing ensures that there is no build-up of ice crystals in the sample. These frozen samples are mounted on metal blocks with an initial chemical fixation step. The fixative is usually FAE (Formalin, Acetic acid, Ethanol, and water).
The tissue sample is embedded with an embedding medium (also called OCT, which stands for Optimal Cutting Temperature agent). Essentially, this OCT compound acts as a glue, which sticks the sample to the tissue sample holder (chuck). The chuck is cooled to the temperature of the cryostat (this is also referred to as CT or Cryostat temperature).
The chuck is then mounted on the chuck holder and the position of the sample is kept perpendicular to the blade. The blade is clamped in the blade holder. The low temperature of the cryostat leads to the preservation or fixation of the ultrastructure of the specimen. This mounted specimen is then cryo-sectioned at -20 to -30-degree C, the temperature of the microtome.
2. Adjusting the sample and optimizing the parameters for sectioning:
The mounting block of tissue samples is mechanically moved forward towards the blade for sectioning. The thickness of the slices is chosen according to the desired micron for the particular application.
There is a wheel mechanism in the cryostat, which mechanically controls the movement of the chuck apparatus. This wheel is kept locked when not in use and has to be unlocked and rotated for getting the right distance from the blades and eventually cutting the ultra-fine slices to get the thickness of the desired micron.
The wheel is designed in such a way that with every single rotation of the wheel, it can be programmed to advance the specimen holder by a specified micron. The section thickness is adjusted to usually 5-10 microns once the knife starts peeling the tissue.[4,5]
3. Adjusting the anti-roll plate or brush; is a critical step:
Another important feature of the cryostat microtome is an anti-roll plate. This plate is brought down and adjusted on the blade in such a way that the slices fall underneath it and over the blade cover. In case there is no anti-roll plate provided with the instrument, one can use a brush to hold the edge of the sectioned tissue sample and place it flat on the blade cover.
4. The golden rule:
According to Abraham Lincoln, “Give me six hours to chop down a tree and I will spend the first four sharpening the ax”. This golden rule must be followed.
The blade of the knife needs to be very sharp to get thin sections. It is advisable that the blade is constantly monitored for bluntness and replaced when needed. Since the blade is not fixed, it can be moved horizontally to replace the blunt portions with sharp ends.
The blade also needs to be cleaned with ethanol before sectioning to remove any dirt or adherent tissue debris. The blade is very sharp and great care needs to be taken while inserting and removing it from the blade holder.
Often, the end of a brush is used to nudge it out of the holder rather than attempting to do the same with fingers.
The speed of slicing by the blade must be optimized by first keeping a steady speed and then cutting the tissue at a faster speed. This ensures that the tissue sectioning generates a clean cut every time.
5. Final piece of advice: Don’t lose your sample!
Many tissue sections are cut so that at least one of these sections provides any worthwhile information when viewed under the microscope. The sample is never left in the cryostat overnight since the machine is usually programmed to defrost and this is going to damage the sample. Usually, if the sample is required to be reused, it is kept back in a low-temperature freezer.[6,7]
Conclusion
The contribution of Cryostat to the healthcare industry is quite significant. Analysis of a small tissue section from the patient is often used to determine the next course of treatment.
In the case of diseases such as cancer, the treatment of a patient cannot resume unless the results of tissue biopsy are back from the immunocytochemistry lab. Thus, it becomes important that diagnosis is concluded early using techniques that involve the Cryostat-microtome.
Furthermore, the cryostat is very important for tissue section preparation for Fourier Transform Infra-Red (FTIR) spectroscopy, where even a small temperature difference between the blade and the sample holder can have huge quality issues in the sectioned samples.[8]
References
- Parma, V. (2013) Cryostat Design. CERN Technology Department, Magnets, Superconductors, and Cryostats Group
- II, J. G. W. (2016) Principles of Cryostat Design, Springer
- Joiner, B. B. (1968)Design and construction of a liquid nitrogen cryostat for use in a swimming pool-type reactor, Missouri University of Science and Technology
- Hyam, P. (2010) Understanding and Maintaining the Cryostat, Springer
- Gschwendtner, A., and Mairinger, T. (1995) How thick is your section? The influence of section thickness on DNA-cytometry on histological sections. Anal Cell Pathol9, 29-37
- Dey, P. (2018) Frozen Section: Principle and Procedure, Springer
- Son, A. I., Sokolowski, K., and Zhou, R. (2013) Cryosectioning. Methods Mol Biol 1018, 301-311
- Liyanage, S., Dassanayake, R. S., Bouyanfif, A., Rajakaruna, E., Ramalingam, L., Moustaid-Moussa, N., and Abidi, N. (2017) Optimization and validation of cryostat temperature conditions for trans-reflectance mode FTIR microspectroscopic imaging of biological tissues. MethodsX4, 118-127